Project CB350: Picking Things Back Up

Doing a complete teardown and rebuild of any vehicle is a massive job. Doing one that involves a great deal of customization, even if it’s something as simple as a motorcycle from the late ‘60s, is an even bigger job. In addition to being massive time sucks, projects like these can also wreak havoc on your wallet, your relationships and your sanity. This often leads people to walking away from a project for a little while, in hopes that some space may help to rekindle their stoke for their build.
This last part happened to me with my very custom 1969 Honda CB350 project. I spent a ton of time and even more money getting together almost all of the parts I needed for the build, and I had someone do virtually all of the fabrication work I needed for my frame; then life happened, and the project has sat in my garage as an expensive pile of parts for over a year.
Now that I’m in a better place mentally and have some more free time, I’m ready to get back into the build. Of course, saying that is easier than doing it because picking up something that you left in pieces many months or years ago and trying to remember exactly where you were with it can be hard, and even this hurdle can lead people to abandon their projects. Not me, though. I can get this figured out, and I’m bringing you along with me.
The way I see it, there are four steps to picking up a project again once you’re committed to doing so, so in this first real installment of my CB350 build series, let’s go through them.
1. Cleaning the garage
Photo: Kyle Hyatt/Jalopnik
This sounds obvious, I know, and if you’re one of those maniacs that manages to keep your garage tidy all the time, know that I hate and envy you. My garage is kind of like the beginning part of the Chernobyl miniseries, where the guy asks how bad the radiation leak is, and the other guy says, “Not great, not terrible.”
I’ve had tools out everywhere from working on my 911 and from detailing my cars, not to mention projects around the house. Add in that my wife goes in and out getting stuff for her gardening projects, and everything is in disarray. I’m starting my cleaning adventure by putting all my tools back where they’re meant to go and getting all the chemicals and supplies back in their cabinets where they live. This will be followed by sweeping and generally being skeeved out by the giant spiders that call my garage home. It’ll give me a blank slate so I can work and not trip over stuff.
2. Taking inventory
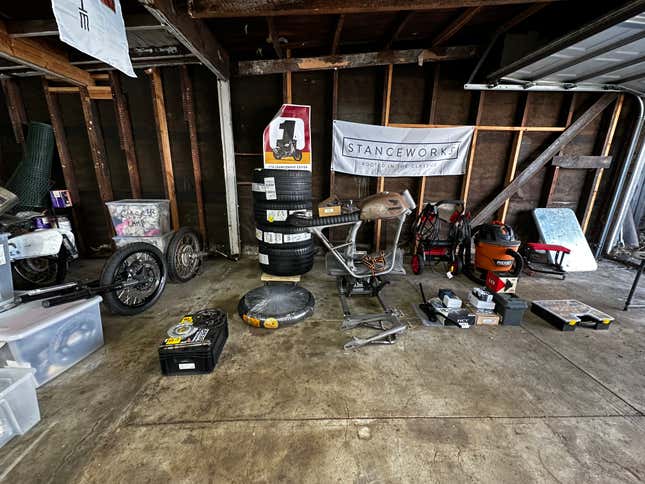
Photo: Kyle Hyatt/Jalopnik
Now that I’ve got clear work surfaces and open floor space, this is the time to take an inventory of what I have, what I need and what has gone missing in the year and a half since I put the project down. If you’re doing a car build, it’s going to be a considerably larger job, but even my little motorcycle has a surprising amount of parts that go with it.
Most of the stuff I bought for the bike is still in its packaging, making things easy. I also have a spreadsheet for ordering parts – an idea that I stole from Aaron Colton – and that helps me know what I need to be looking for, at least partly. Other stuff, like parts from the two donor bikes that I have need to be categorized, sorted and labeled, but that’s a different step in the process.
Now that my workbench, folding table and garage floor all look like the start of James May’s “The Reassembler,” it’s time to move on.
3. Organization
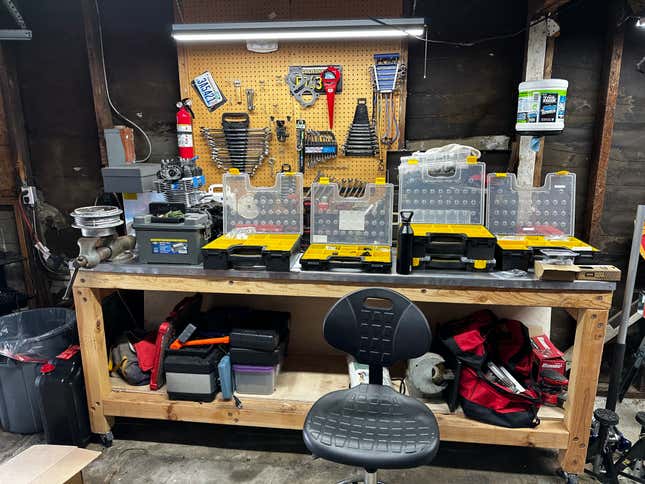
Photo: Kyle Hyatt/Jalopnik
This step seems obvious, but it’s also the most tedious and arguably boring step in the process, and so it’s most likely the one that will cause people to bail on the project again. The trick here is technology. Well, technology and the patience of a saint, but mostly technology. Oh, and cheap parts organizers from Amazon or Harbor Freight.
My first step in organizing is to fire up Google Sheets (or Excel, whatever) and start a fresh spreadsheet. Then I go around the garage to the parts and group them by system or by location on the bike, whichever makes the most sense – brake and clutch levers, throttle and handlebars are all part of the controls group, but so are the footpegs, for example – and then I start entering what goes in that group into my spreadsheet.
The spreadsheet is organized into large categories for those systems or locations – front end, front wheel, rear wheel, etc. – with the part nested below along with that part’s part number and how many I have (two rearview mirrors from MotoGadget, one pair of Vans waffle sole hand grips) and also what condition the part is in – new, used and ready or used and needs to be refurbished.
Small parts go in plastic organizers; those organizers get labels from my cheap handheld label printer. I’d love to be able to go a step further and get a barcode or QR code-based system going, but for a project of this size, that kind of inventory management is super overkill.
Lastly, as I’m going through things, I’m wiping them off and generally making them look presentable. It’s way easier for me to get motivated by an organized group of clean-looking parts than by a pile of old, dirty crap that anyone else would assume is trash.
4. Order What You Need And Determine An Order Of Operations
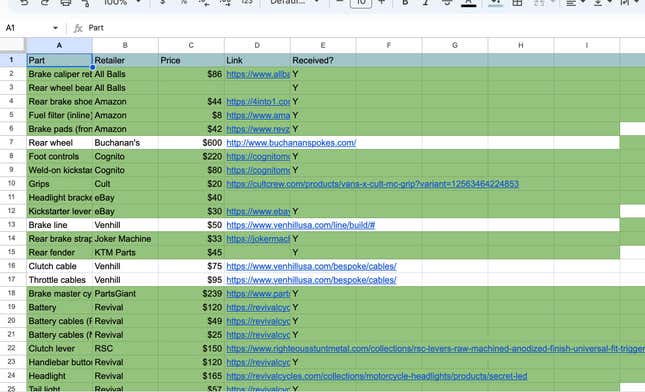
Screenshot: Kyle Hyatt/Jalopnik
Now that I know what I have and the spreadsheet backs that up, I can try to get a list together of what I still need. I have a second running spreadsheet for this purpose, and it’s color-coded so I know when I’ve ordered a part, if it’s in shipping and if it’s shown up. I have columns for the name of the part (either a specific product name like EBC brake pads or just a generic name like intake boots for carbs), the part number if available, how much it costs, where I plan to order it from and a link to where I’m going to order it from, and if I’ve ordered it.
When I order a part I code it yellow. Once I receive the part, I change the line to green and I put an X in the “Received?” column. It’s basic, but it works for me. If a part is high priority and is holding up other jobs, then I code it red, so I know I need to order that asap. This spreadsheet is just another tab on my overall parts organization spreadsheet. Once a part comes in, I add it to the main spreadsheet in the appropriate group.
Lastly, I have to figure out what order to tackle things in to make the build progress smoothly. For example, in my situation, having the bike as a roller will make everything else considerably simpler. So, that means I need to build the front end, which involves getting forks into triples and top yokes, pressing bearings into the steering head and assembling the wheels and axles. From there, I go to mounting the rear suspension and swingarm, then putting the motor in the chassis, then assembling the controls, then wiring and so on.
From there, all that’s left is to actually get out to the garage and do the damned thing. I aim to have the bike done and rideable by the end of this summer. It might be an ambitious goal, but I suspect that once I get the initial pre-paint dry build done, everything else will happen pretty fast.
Now, I’m not saying that my system will work for everyone, but it’s pretty easy, and I’ve found that it breaks things up enough to not make them daunting. The idea of starting a project build back up is daunting enough as it is, so lowering the bar to getting back into it is a good thing. Now, if you’ll excuse me, I’ve got some cleaning to do.